Extension Configuration
The Configuration screen appears when you click Configure next to the Airlock extension in your Adobe Launch (Tags) property. Settings here apply globally across all rules in the property.
Extension Configuration
 Description: The full Extension Configuration screen in Launch, showing all sections visible at once.
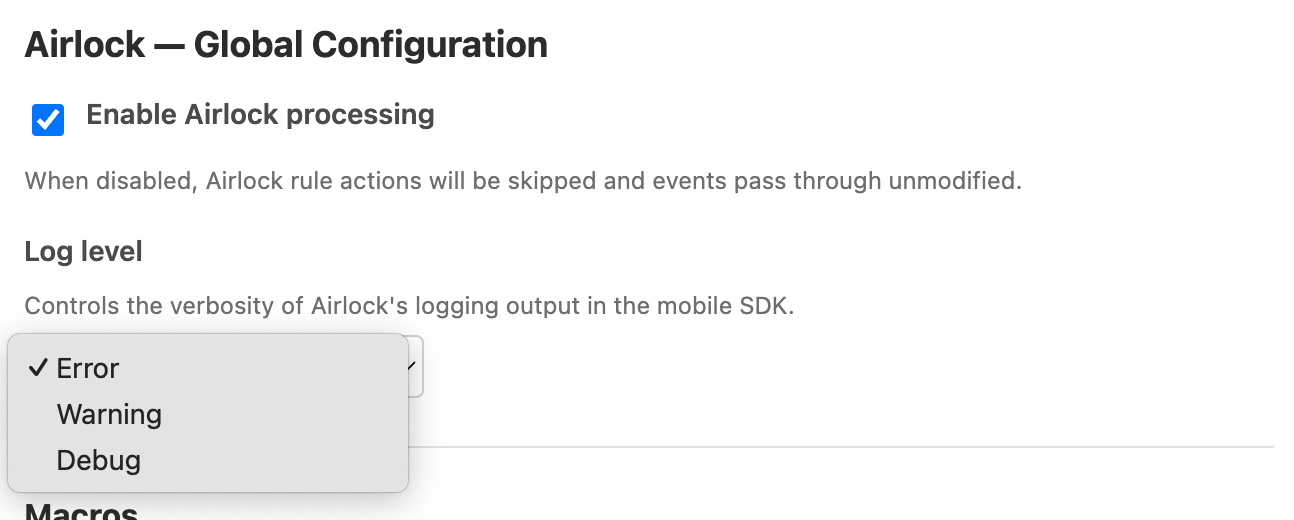
Enabled
A global on/off switch for the entire extension. When disabled, Airlock receives events but immediately passes them through without processing — no JS evaluation, no serialization, no enrichment. Rules continue to fire and Airlock actions are called, but all processing is skipped.
Use this to pause Airlock across all rules at once without republishing individual rules or actions.
Default: Enabled.
Log Level
Controls the verbosity of Airlock's debug output. Logs appear in Xcode's console (iOS) or Logcat (Android) and are prefixed for easy filtering.
| Level | What you see |
|---|---|
error |
Only errors — the default; suitable for production |
warning |
Errors and warnings (e.g. a JS script timed out, a lookup table is misconfigured) |
debug |
Full trace: every event cached, every rule evaluated, every shared state published |
Set to debug while building and testing rules, then switch back to error before publishing to production.
Log Level
 Description: The Log Level dropdown open, showing the three options.
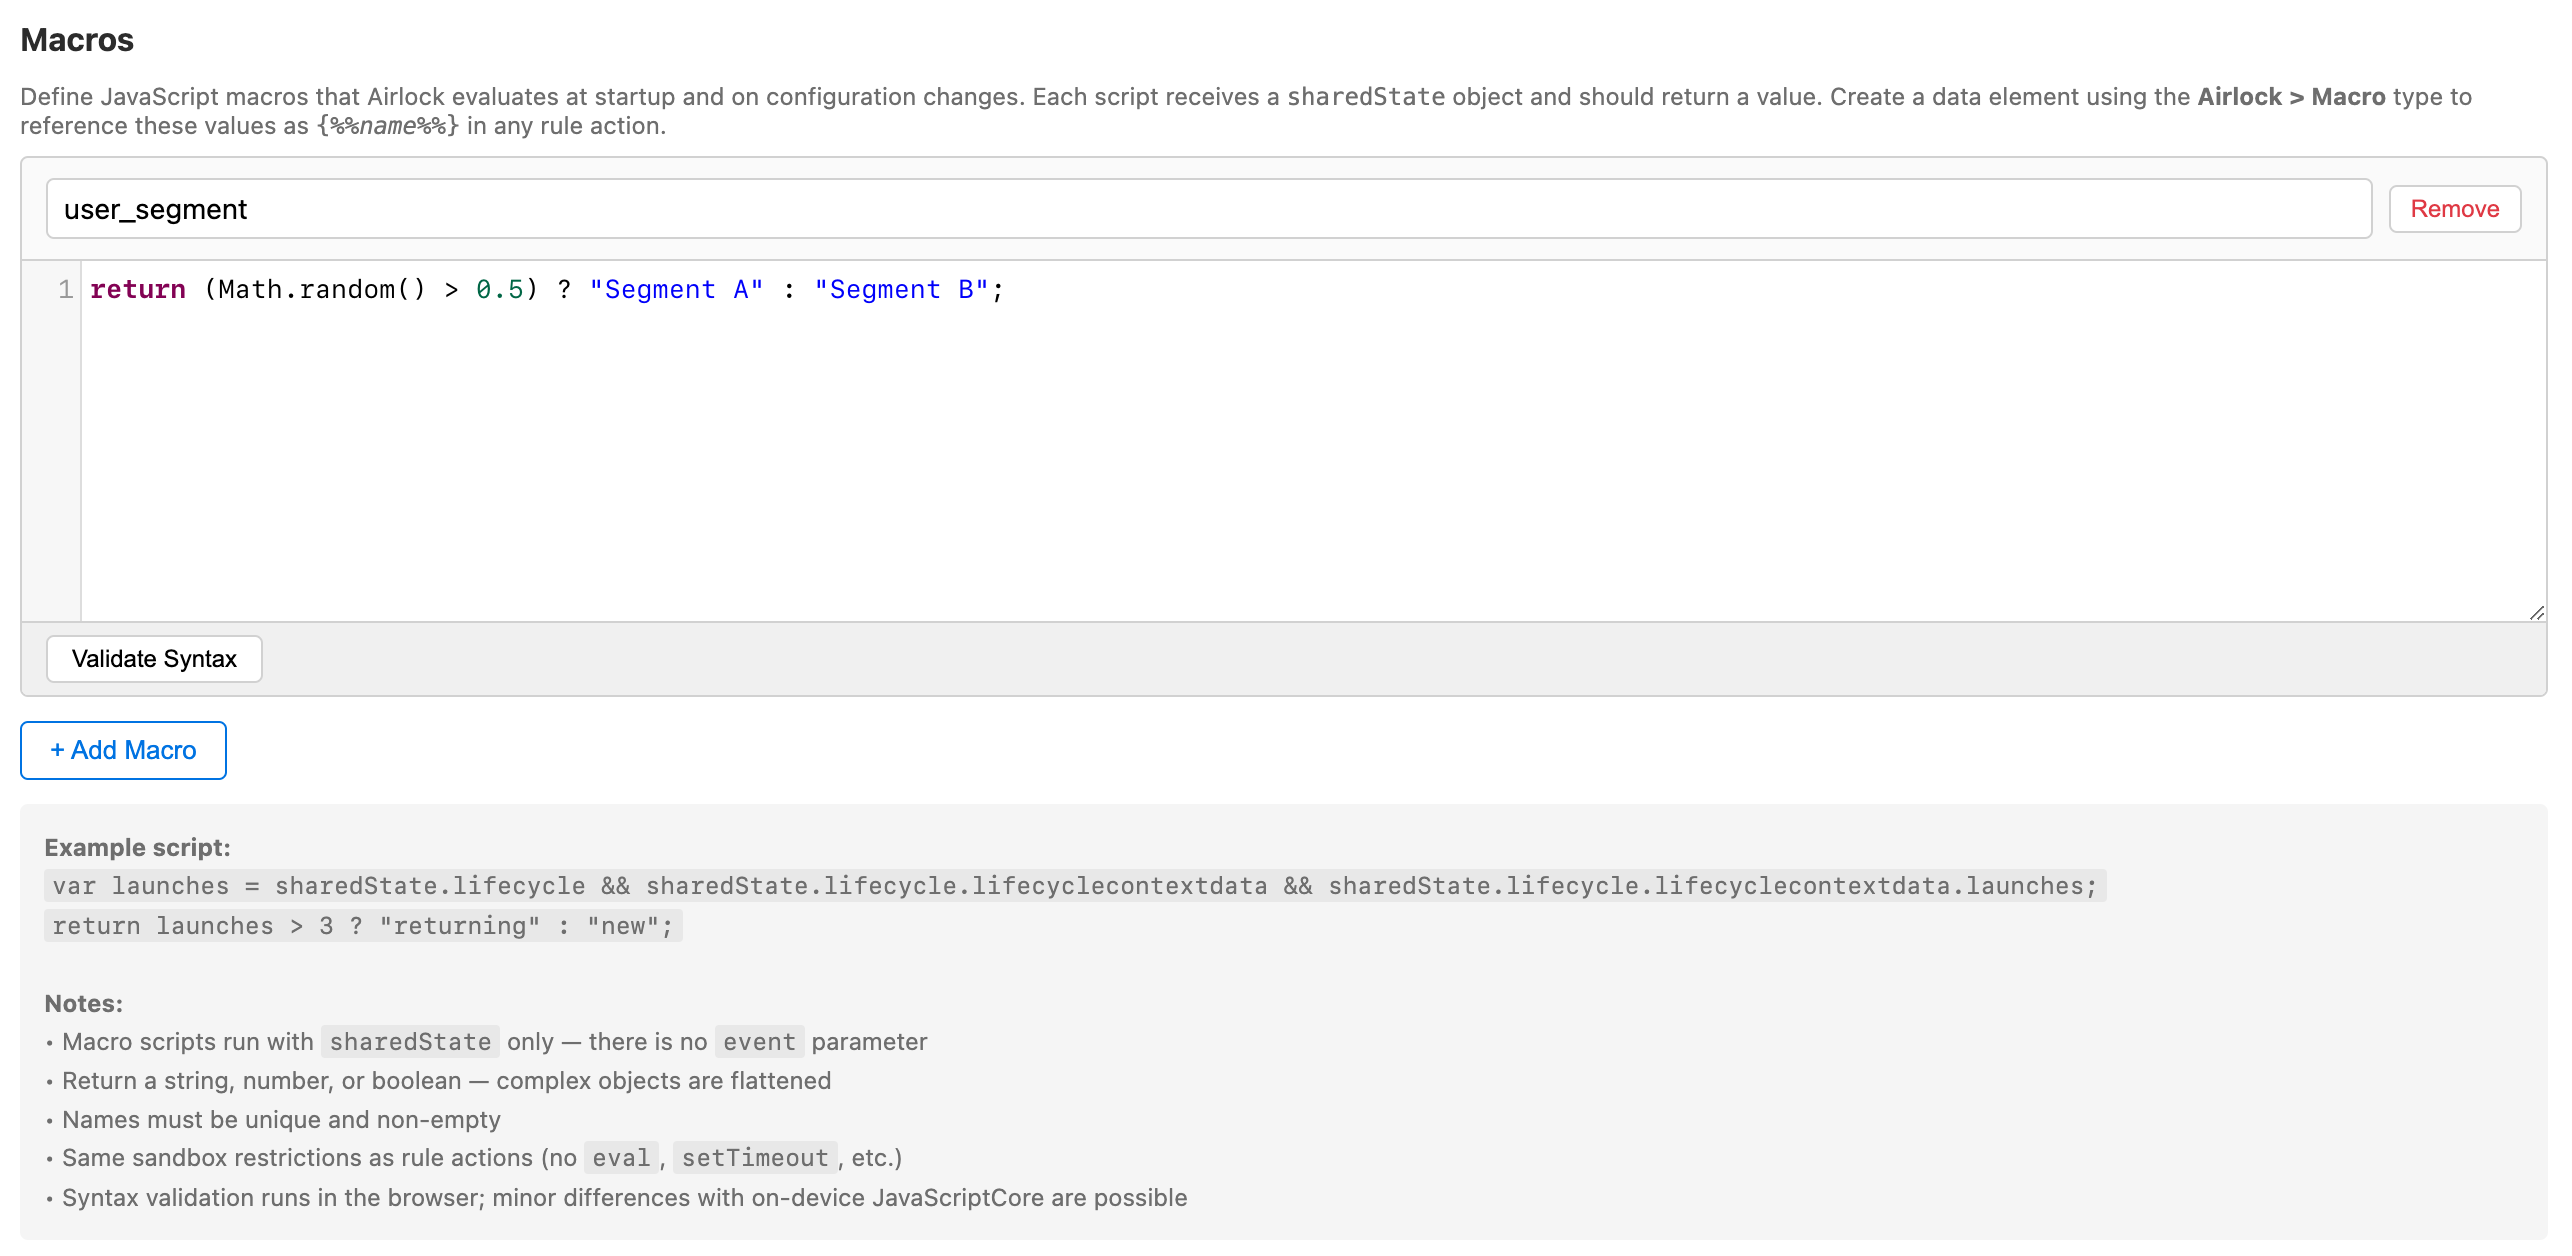
Macros
Macros are JavaScript snippets that run once when the Launch configuration loads — not per event. Each macro receives sharedState (a snapshot of all registered extensions' shared state at config-load time) and returns a value. The return value is published into Airlock's own shared state under the macro's name, making it available to rule scripts via sharedState.airlock.<macroName>.
When to use macros: For values that are expensive to compute or that don't change per event — for example, deriving a user tier from Identity shared state, or computing a formatted timestamp at session start.
Adding a macro
- Click + Add macro.
- Give the macro a name (e.g.
userTier). This becomes the key insharedState.airlock. - Write the script. The script body must return a value.
// Example: read the ECID from Identity shared state
return sharedState.identity && sharedState.identity.mid
  ? sharedState.identity.mid.substring(0, 8)
  : null;
- Click Test to evaluate the script against a sample sharedState and confirm it returns the expected value.
Note
Macros run with the same sandbox constraints as rule scripts: no setTimeout, no DOM, no network access. See Evaluate JavaScript Rules for the full constraint list.
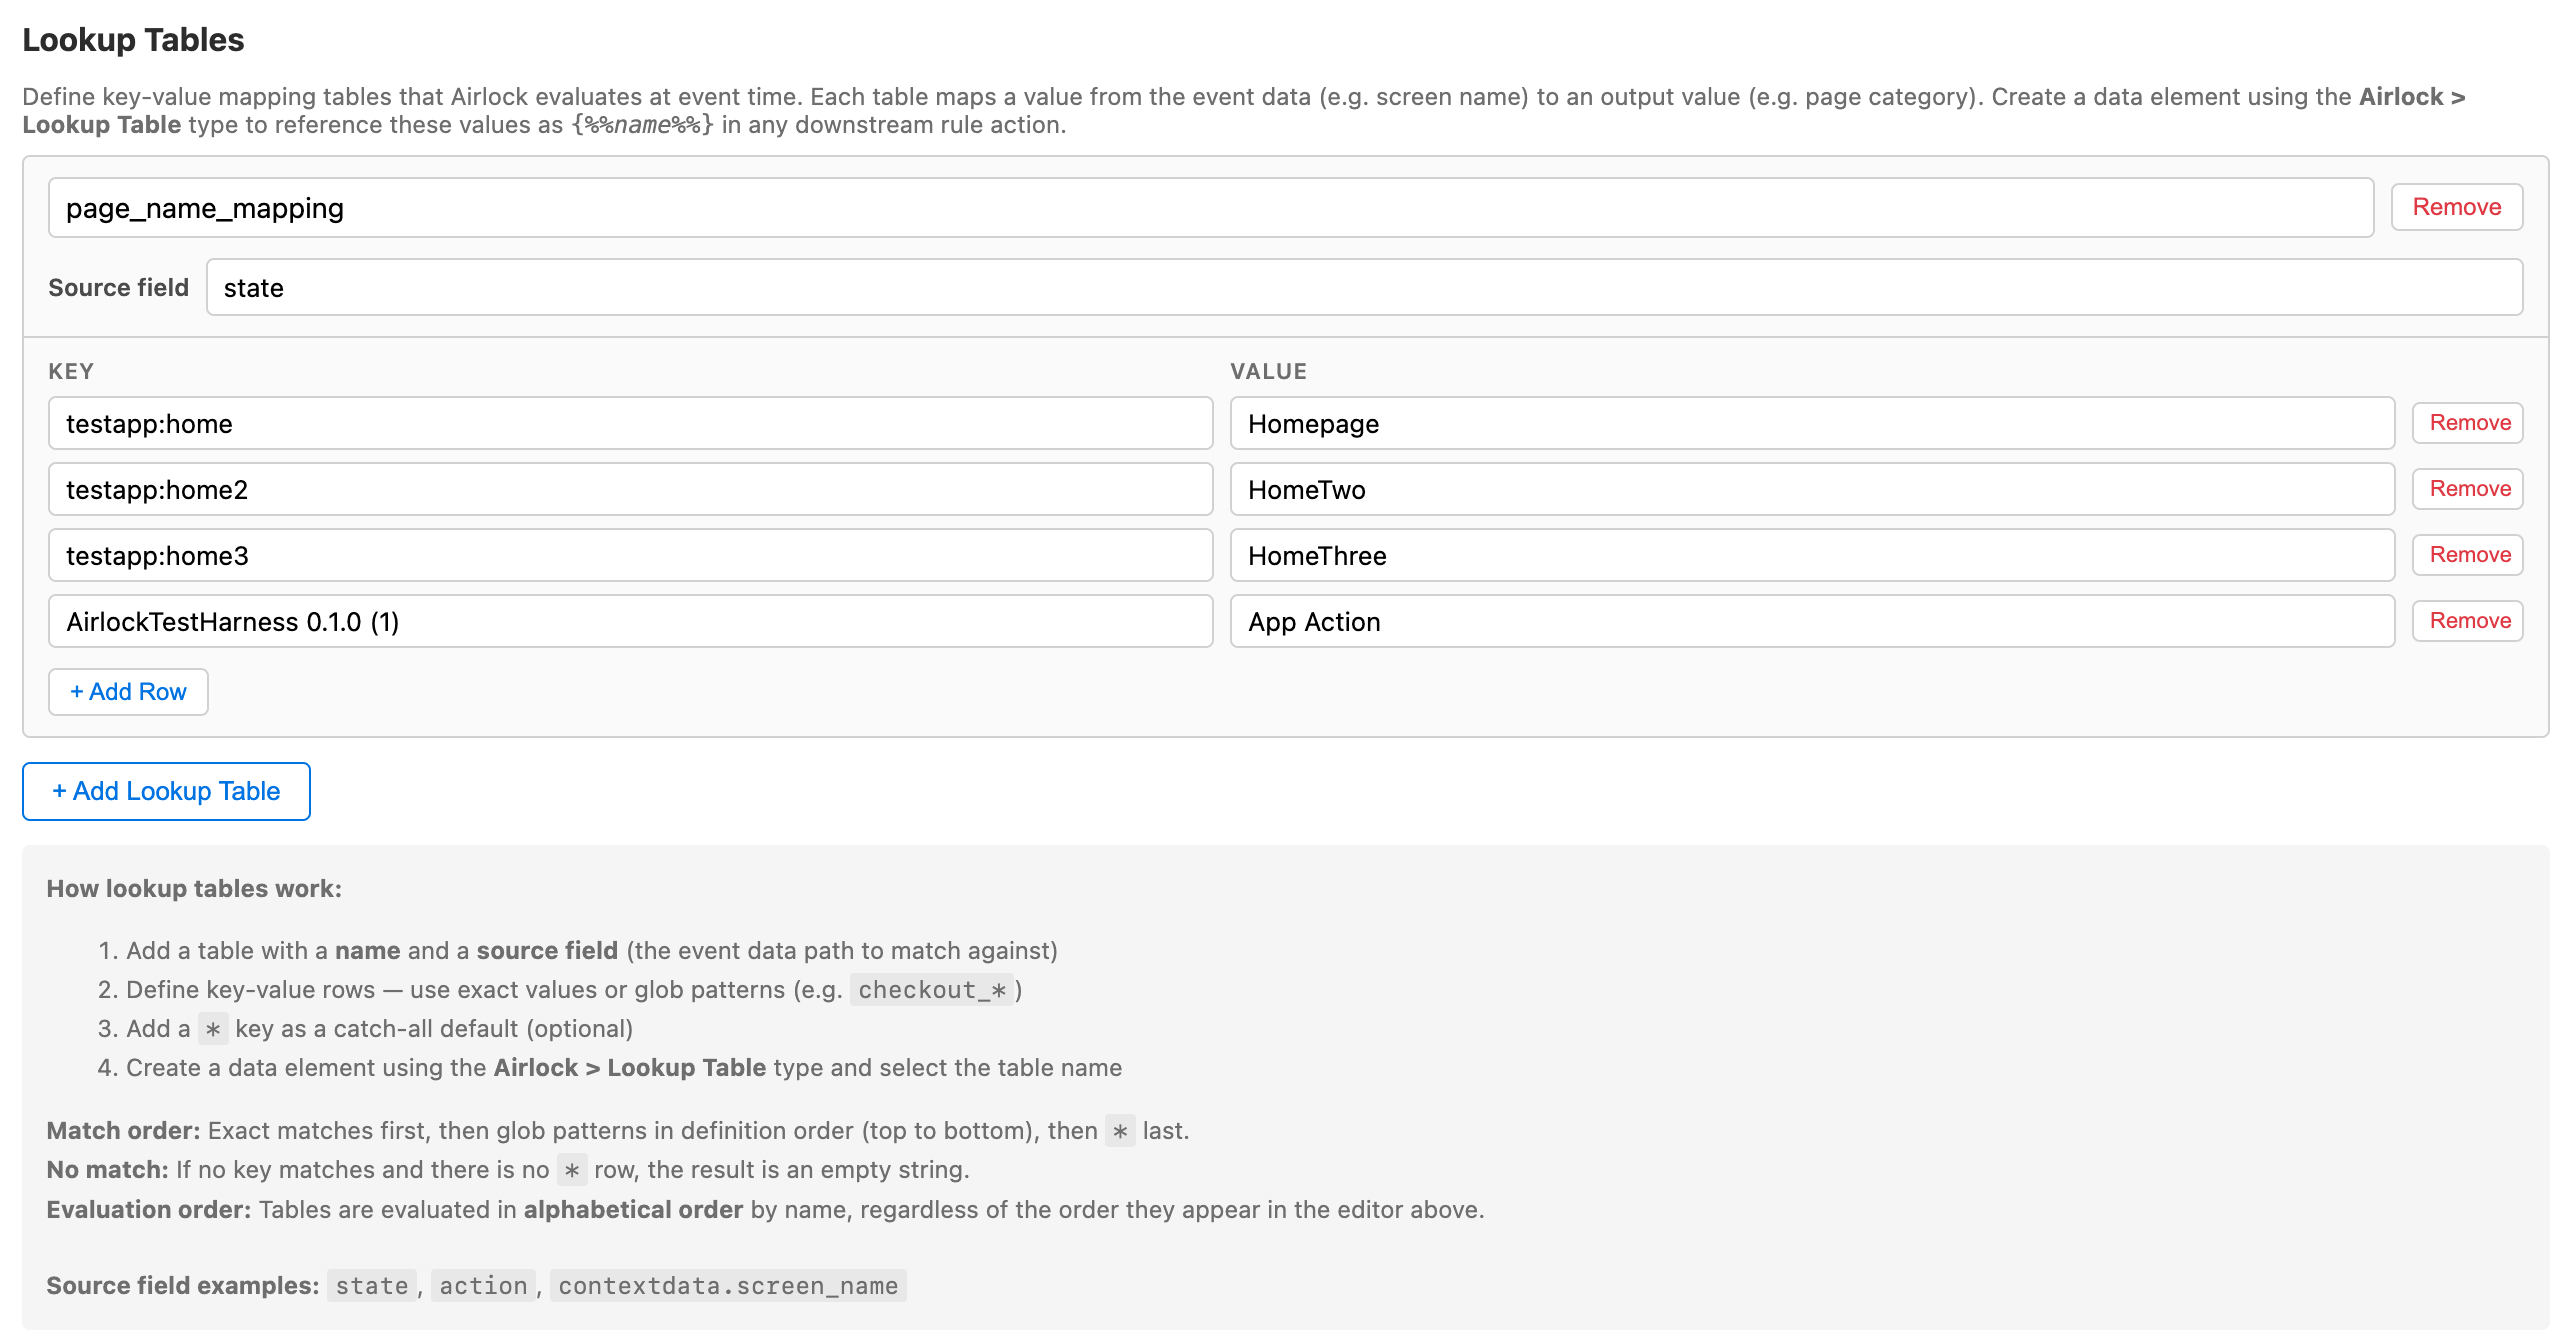
Lookup Tables
A Lookup Table maps a value from an event's contextdata to a configured output string. The resolved output is published into Airlock's shared state at event time, making it available as a data element (via Lookup Table) in Launch conditions and actions.
When to use lookup tables: When you need to translate a code-level value into a human-readable label without app code — for example, mapping a screen_id integer to a friendly screen name, or translating a product category code to a marketing label.
Adding a lookup table
- Click + Add lookup table.
- Give the table a name (e.g.
screenName). - Set the Source path — a dot-notation path into the event data (e.g.
contextdata.screen_id). - Add rows. Each row has an Input (the value to match) and an Output (the string to return). The first matching row wins.
| Input | Output |
|---|---|
home |
Home Screen |
pdp |
Product Detail |
checkout |
Checkout |
If no row matches, the output is an empty string.
Lookup table configuration
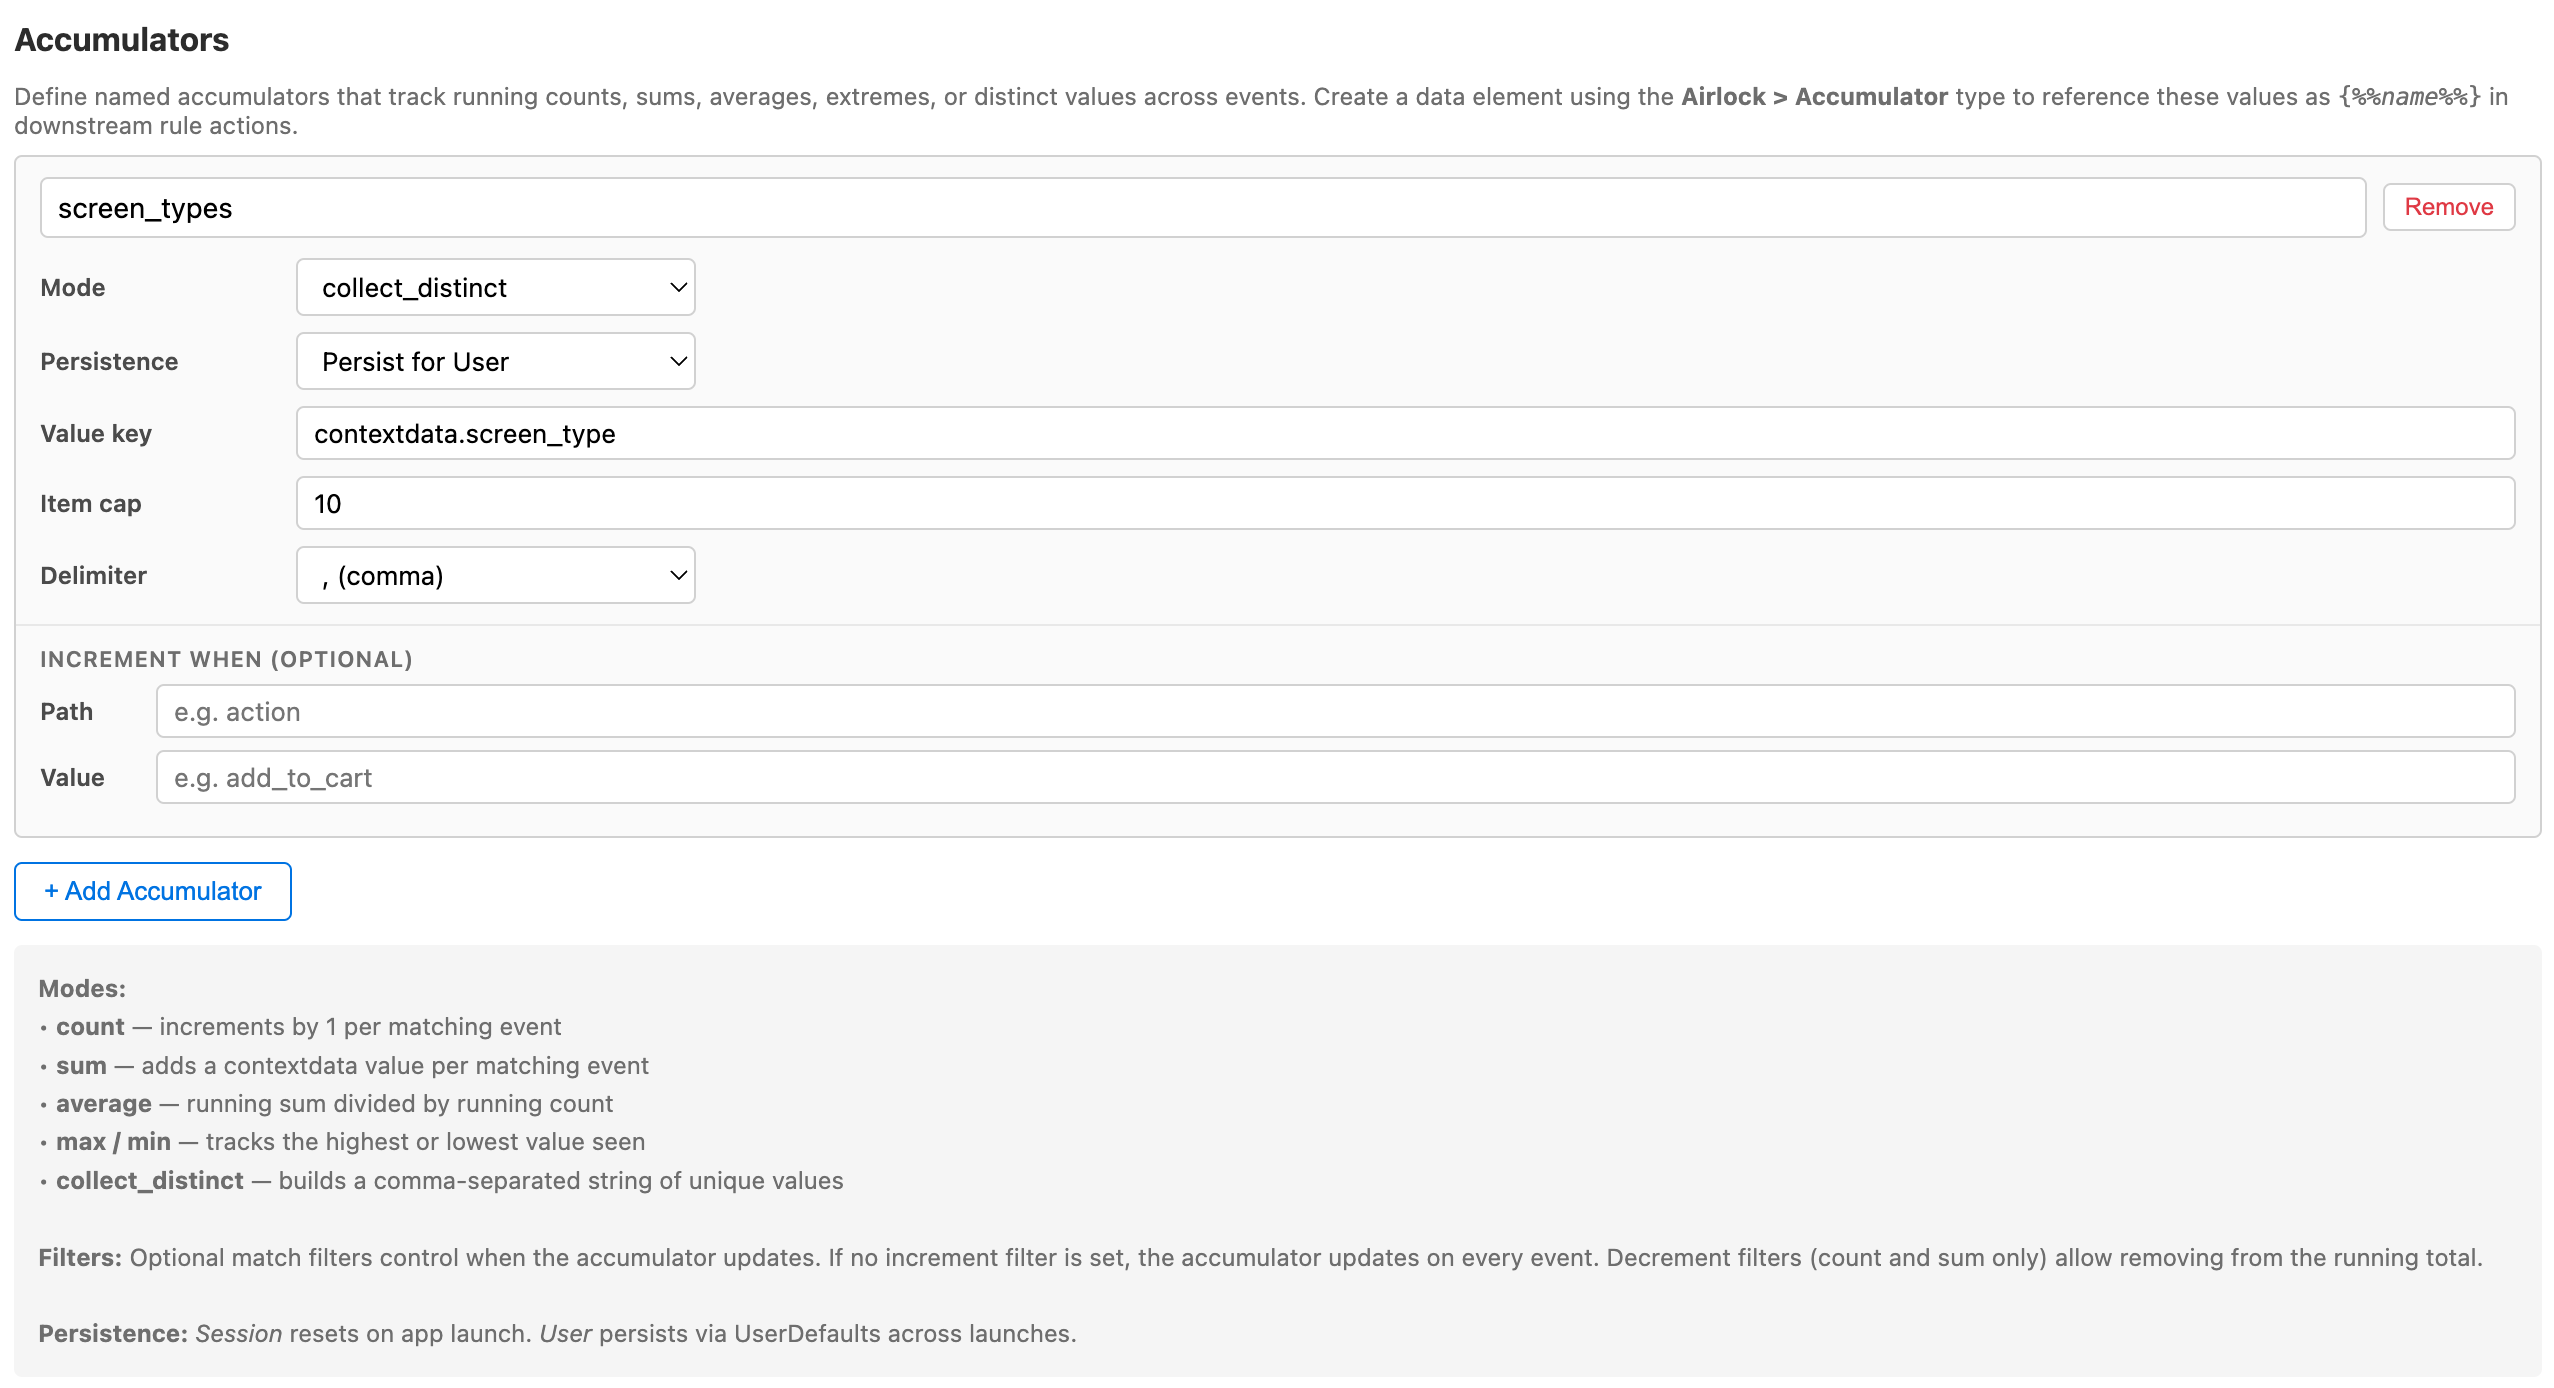
Accumulators
Accumulators maintain a running count or sum across events — a counter that Airlock increments automatically each time a matching event fires. The current value is published into Airlock's shared state at event time, making it available as a data element (via Session Accumulator) in Launch conditions and actions.
When to use accumulators: For logic that depends on how many times something has happened — "fire this event only on the third screen view", "track cumulative purchase value for this session", "gate a push notification after five app opens".
Adding an accumulator
- Click + Add accumulator.
- Give it a name (e.g.
screenViews). - Set the Mode:
- Count — increments by 1 on every qualifying event
- Sum — adds a numeric value from the event payload on every qualifying event
- Set the Persistence:
- Session — resets when the app is closed (in-memory only)
- User — persists across app restarts (stored in UserDefaults on iOS)
For Sum mode, set the Value path — a dot-notation path to the numeric value in the event data (e.g. contextdata.purchase_amount).
Accumulators example
See also
- Session Accumulator data element — how to reference an accumulator's value in Launch conditions
- Lookup Table data element — how to reference a lookup table's value in Launch conditions
- Reset Accumulators action — how to zero an accumulator from a Launch rule